How to insert multiple rows or columns into your Spreadsheet
There are going to be times when working with your spreadsheets, you will need to insert a new row or a new column into your data. But what happens if you need to insert more than one row or column. What would you do if you had to insert 50 or more new rows or new columns into your spreadsheet?
Yes, you could insert them one at a time, but that would be very tedious and not to mention a waste of your precious time.
Luckily, there’s an easy way to accomplish this task in Excel.
The following video steps you through the process of how to insert multiple rows or columns into your spreadsheet, or if you prefer you can read through the step-by-step instructions shown below the video.
Step by step instructions:
Insert a single row
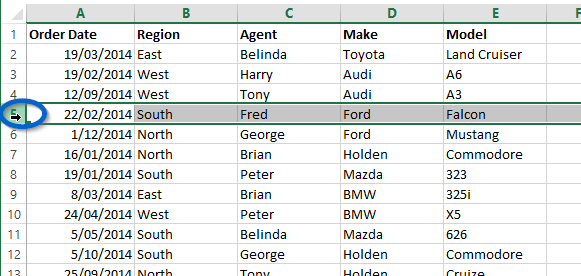
Step 1 Left click on the row number of the row immediately below where you want to insert the new row.
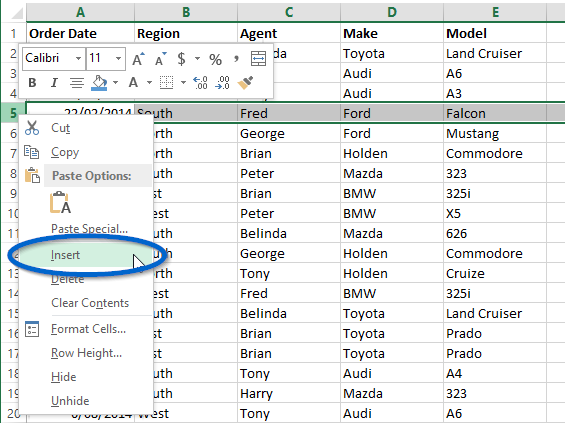
Step 2 Right click on the selected row and then click “Insert”.
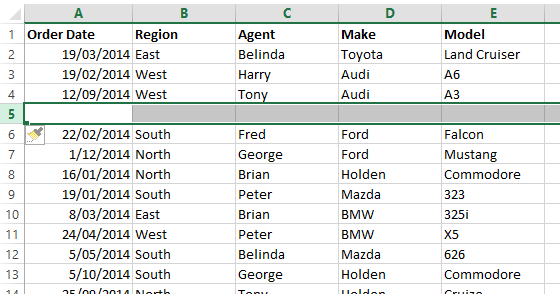
A new row will now have been inserted above the row we selected – row 5 in our example.
Insert a single column
Step 1 Left click on the column letter of the column immediately to the right of where you want to insert the new column.
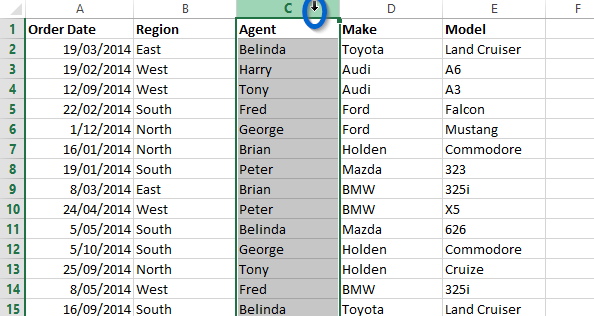
Step 2 Right click on the selected column and then click “Insert”.
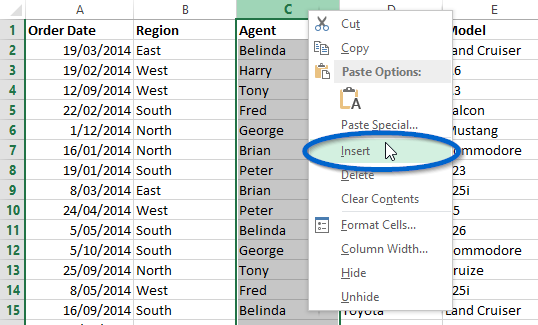
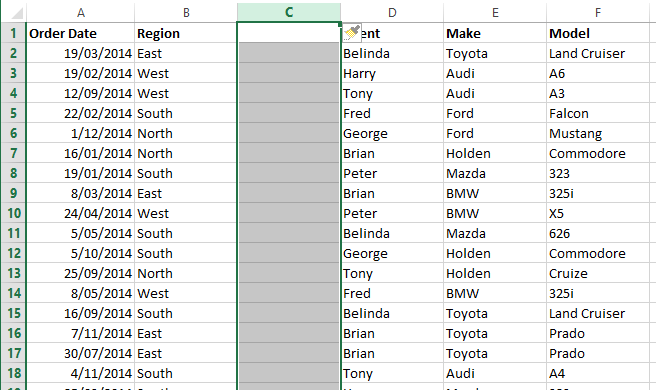
A new column will now have been inserted to the left of the column we selected – column C in our example.
Insert multiple rows
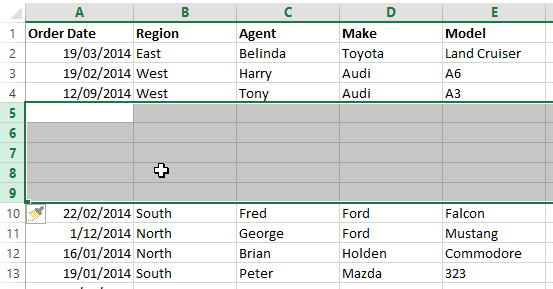
Step 1 Left click on the row number of the row immediately below where you want to insert the new rows AND drag down the number of rows you wish to insert. In our example below, I am wanting to insert 5 new rows, so I have clicked AND dragged from row 5 down to row 9 (5 rows in total).
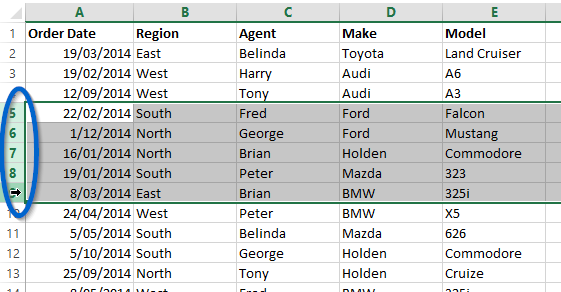
Step 2 Right click on any of the selected rows and then click “Insert”.
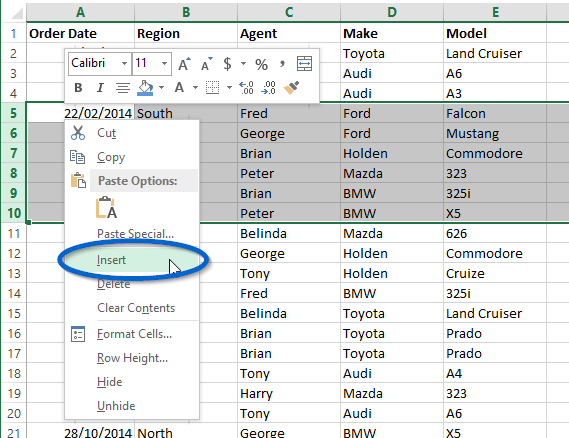
New rows will now have been inserted above the row we selected – 5 rows inserted above row 5 in our example.
Insert multiple columns
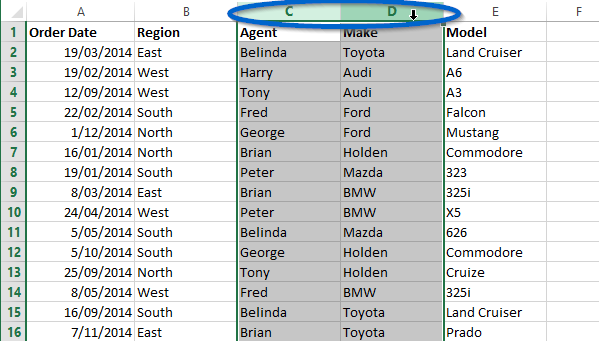
Step 1 Left click on the column letter of the column immediately to the right of where you want to insert the new columns AND drag across to the right the number of columns you wish to insert. In our example below, I am wanting to insert 2 new columns, so I have clicked AND dragged from column C across to and including column D (2 columns in total).
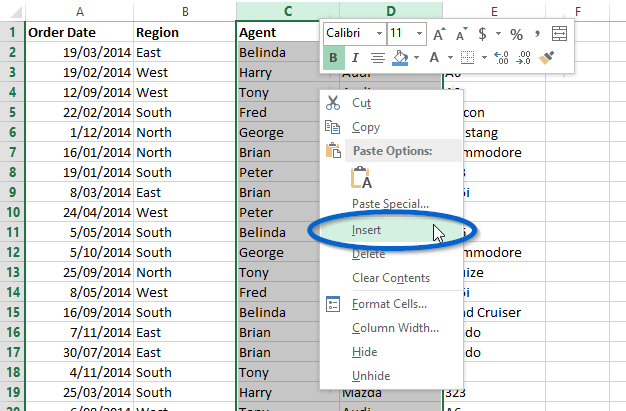
Step 2 Right click on any of the selected rows and then click “Insert”.
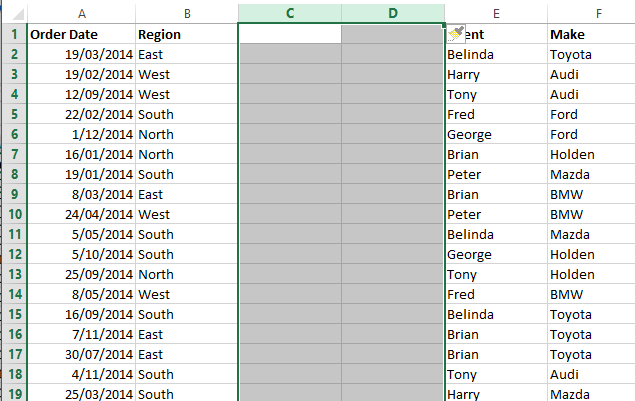
New columns will now have been inserted to the left of the column we selected – 2 columns inserted to the left of column C in our example.
Ok, that’s it for this tip, as always should you have any questions or queries about any information I have provided, let me know.
Till next time.
Cheers,
Brian
Please Share
If you liked this or know someone who could use it, please click the buttons below to share it with your friends on LinkedIn, Google+, Facebook, and Twitter.
Download
You can download a PDF transcript of this tip by clicking the following link – How to insert multiple rows or columns into your Spreadsheet.
You can also download a copy of the spreadsheet I used in this article so you can explore this tip further – How to insert multiple rows or columns into your Spreadsheet.
